
Most of us use package managers to install software on our Linux systems today. Package managers give you power to resolve the required dependencies on the go. You can simply type one line of command and install your software depending upon your Distro. Popular package managers include APT, YUM, RPM etc.. But when you need more control over your system you might wanna do things on low level. You can install software on your system from bare source code for which you need no package manager. Installing software from source code is not too easy . But if you grasp basic principle then all you need is some patience and source code to compile.
When you start compiling or installing the software from the source code it may lead to dependency hell. Dependency hell is a situation where the software you want to install requires another software of specific version to be installed and that software further requires another software to be installed as a dependency. It becomes time consuming vicious cycle. That’s why people prefer using package manager. It automatically resolves all the required dependencies.
Downloading and extracting source code
So to install software from source, first thing you need is to download tarball or any other archive type in which your source code is packed. You can download the tarball simply by going to the software website. You can also use wget in terminal to get the tarball.
wget www.some-url.com/path-to-archive
Next you need to extract the tarball archive by using given commands
For example, if your tarball extension ends with *tar.gz then use this
tar -xvpf archive-name.tar.gz
for *tar.bz2 use this:
tar -xvjf filename.tar.bz2
after successful extraction of the tar ball archive you need to go to the folder created by tarball extraction in which your source code is present.
cd foldername
Look for the files named “readme” and “install” in there. Check if there are any additional steps to follow for installation listed there. If your software requires any special dependencies it should be listed there. These two file names(readme and install) may vary in some other software but this is the mostly used naming convention.
Configuring build environment
Now we have enough info about the software documentation. Now we need to configure the build environment for compilation and installation. Most of the source code packages contain a configuration script named “configure”. If you can’t seem to find it then you can check for the configuration script name in readme and and run it. So now you need to run the “configure” file as shown below. It will configure the build environment and check if all the required tools and dependencies are presently installed in system.
./configure
NOTE: From this point you are also required to have root privileges so don’t forget to use “sudo”.
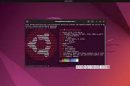
Compilation and installation
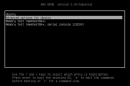
After running the configure script, if everything goes right then you will have the makefile in the same directory. If configuration process is halted midway then it means you need to resolve all the software dependencies and rerun the configuration script.
To start the compilation process you will need to run the “make” command in the same directory.
make
It will link up and compile all the source code. Once the source code is compiled then you will need to install those compiled binaries to the standard system location so that you could run your program from anywhere in your system. Run the following command to install the compiled binaries.
make install
It is the last step in installing the software from source code and once this step is completely finished, your software will be installed successfully.


[…] RECOMMENDED: How To Install Software From A Source Code […]
[…] RECOMMENDED: How To Install Software From A Source Code […]