People Spend a lot of their resources for deploying chats on their website and social networking platforms like Whatsapp, Facebook, Twitter etc. Most of the queries from the visitors are just basic questions about your business or portfolio. This clunky task can be automated with machine intelligence now. This chatbox that we are going to build can be integrated with any kind of platform such as E-commerce site, blog or any other business website. Chatbot will be able to take orders, booking or any other critical information through chat.
Setting up prerequisites for chatbox
We are gonna use Google’s machine learning platform Dialog-flow to build our chatbot. We can build this chatbot for any kind of website, you just need to copy the code snippet and place it on your website. For sake of this tutorial we are gonna use WordPress. You can simply copy paste the code in your WordPress, but we are gonna use the plugin by the name “My Chatbot” because it has a lot of great features which are listed below.
- Assume the appearance of a Dialogflow supported messaging platform to display rich message content. Quick Replies and Image rich messages are supported.
- You can do your own branding.
- Add hyperlinks in response message content using HTML markup.
- An overlay can be added on every page to display the chatbot. The overlay can toggle up or down
- A shortcode and widget are available to display the chatbot.
- Settings with color pickers for backgrounds and fonts, custom text (e.g. powered by) and opacity for old conversation bubbles.
- Lightweight and super fast as it uses the Dialogflow Agent API to process natural language queries.
- Enable the chatbot overlay to be displayed on specific posts.
- In-built template system and plenty of extensible WordPress action hooks & filters.
Download and install the My chatbox plugin on your WordPress website from this link https://wordpress.org/plugins/my-chatbot.
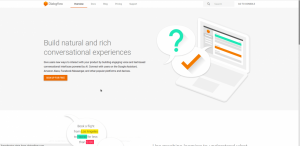
Let’s get started. Go to https://dialogflow.com and sign-up.
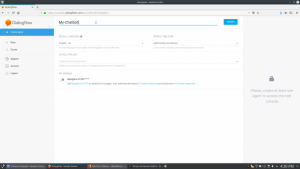
After the successful sign up process, from the top left panel create a new agent and enter all the basic details.
Click on the gear icon. It is on the right-side to your chat agent’s name and copy the client access token.
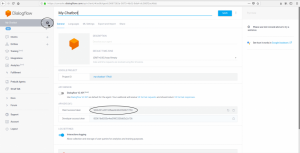
Now go to your WordPress Website and paste this client access token in your my chatbot plugin as shown below.
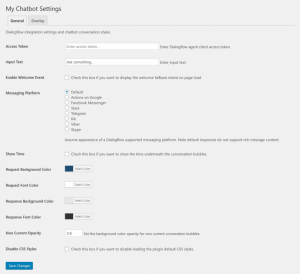
Now click on overlay tab and check the “Enable Overlay” checkbox. If it’s already checked then leave it. This will allow your chatbot to appear on every-page on your site. If you want to disable chatbot on certain pages or posts, you can do that by going to edit posts and pages and disable them.
Training Your Chatbot
Now we can start training our chatbot. Before we add anything functional to our chat agent first we need to understand some basic terminology that Dialogflow uses.
Intent:- According to Dialogflow Docs “An intent represents a mapping between what a user says and what action should be taken by your software.” In other words, Intent defines how your chatbot is going to respond to the user’s input.
Entities:- Entities are used to obtain information from user’s natural language inputs. You can use entities to automate tasks like taking orders online or collect valuable input from a user.
Actions:- Actions are used to carry out series of steps when specific intent is triggered by the user input. Actions are used when specific user input is captured.
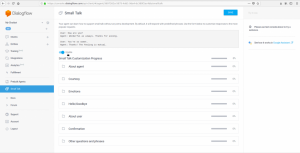
At this point, your agent is ready for training. You can train your chatbot for small talk just by enabling the small talk option as shown in the pictures below.
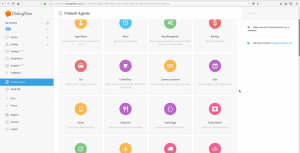
DialogFlow provides you prebuilt chat agent. You can also just import them and use them as a base to build your agent. This approach will give you outline for better understanding the working of Dialogflow. Go to the pre-built agent from the left panel and import the agent of your choice. There are many types of pre-built chat agents for to choose from as shown below in the picture.
But if you want to build your agent from scratch, you can do that too.
Just click on intents in left panel and then click on create intent.
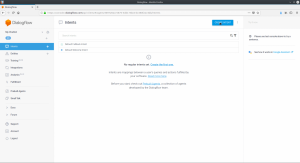
Now under Training phrases enter as many as training phrases as you expect user to use to ask certain question. For example, To start a conversation user might enter the following phrases.
“hello”
“hi”
“hi, How are you”
“hey”
“hey there”
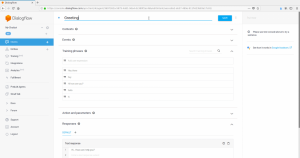
Enter all possible responses under the responses section as shown in the picture above.
For instance…
“Hi! How may I help you?”
So you can enter all these phrases in Training phrases to train your agent for first greetings. However there are also other advance parameters to set like, Context, Action and events. Which we are ignoring at the moment to keep things simple.
Now for new different question create new intent and add all the possible phrases that you think user might use to ask question, although DialogFlow is already intelligent enough to understand the user input from just one phrases but as you add more intent in your agent it might get confusing for your bot.
You can also use context to make your chatbot even smarter. Context allows your chatbot to remember the previous preference that user has set through his input.


hii sir;
sir can u please tell how to break a web app made up in django frame work